Yes roll pins work very well. choose a size that firmly fits the shaft of the screw.
Break off the other half of the head which is usually quite easy to do if the brass has de-zinced. Put the roll pin in a drill in a slow reverse and it will cut very cleanly around the screw eventually it will usually grab the shaft and undo it anyway.
Do it little by little and keep cleary the muck.
It will leave a very clean hole for plugging.
Using and ordinary drill will make an awfull mess.
Removing brass stews from keel?
Re: Removing brass stews from keel?
I have read that cutting/filing a v in the roll pin to act as a "saw tooth" is effective. Anyone know if this is the case ?.

Re: Removing brass stews from keel?
Worked for me....I did that
eib
eib
Ed Bremner
CVRDA
Jollyboat J3
Firefly F2942
IC GBR314 ex S51 - 1970 Slurp
MR 638 - Please come and take it away
Phelps Scull
Bathurst Whiff - looking for someone to love it
CVRDA
Jollyboat J3
Firefly F2942
IC GBR314 ex S51 - 1970 Slurp
MR 638 - Please come and take it away
Phelps Scull
Bathurst Whiff - looking for someone to love it
-
Chrisrjwood
- Posts: 170
- Joined: Sun Nov 27, 2011 11:33 pm
- Location: Suffolk
Re: Removing brass stews from keel?
A lot of the screws are breaking off at half the head when I try to unscrew them and the wood is getting damaged when I try to break off the other half.....
Any suggestions?
Any suggestions?
Chrisrjwood
Jollyboat J325 Serendipity
Rouse I14 'Brown Trousers' K1094
Kirby 7 I14 Last Chance K1120
Penultimate I14 K1337
Int 14 K391 Velocity
Uffa Fox I14 Nymph K524 (under restoration)
Jollyboat J325 Serendipity
Rouse I14 'Brown Trousers' K1094
Kirby 7 I14 Last Chance K1120
Penultimate I14 K1337
Int 14 K391 Velocity
Uffa Fox I14 Nymph K524 (under restoration)
Re: Removing brass stews from keel?
I have been working on the Herons rudder and this happened. I used a small burr in the dremel to grind off the bit of head that was left, then used the roll pin trick.
It takes time and care not to damage anything, the dremel and fein are great tools and I would not be without mine now and can be put to so many uses on a boat .
I had one screw that the roll pin would not back out, but it cuts down tight around the screw and I was able to lift/lever the piece off and use mole grips to get the last bit of screw out . HTH.
-
Brian E. Evans
- Posts: 127
- Joined: Sat Oct 02, 2004 6:31 am
- Location: USA
- Contact:
Re: Removing brass stews from keel?
There are little hollow drills that work a little better than roll pins made by different companies there is Screw Go in Germany Un screw em., and screw extractor in the USA. they are all little left handed hole saws of varying diameters and lengths that use the old screw as a pilot to remove a plug with the old screw in it, enabling you to put a glued in dowel back into the hole you just made. much cleaner than the oversized crowbar.
Brian Evans.
Brian Evans.

Re: Removing brass stews from keel?
So Ent 878 is now 'buns up' resting on timbers and the paint stripped back to the keel timber so it's time to gut out the roached c/brd gasket which is underneath the keel bands so it's time to... duh duh duuuuurrrrhh! ...remove the keel band screws. 20+ of them around the centreboard slot and "Y" pieces of which I expected to remove maybe 5 of them intact! I was right. The same percentage applied to the removal of all the rudder fittings. Rats!
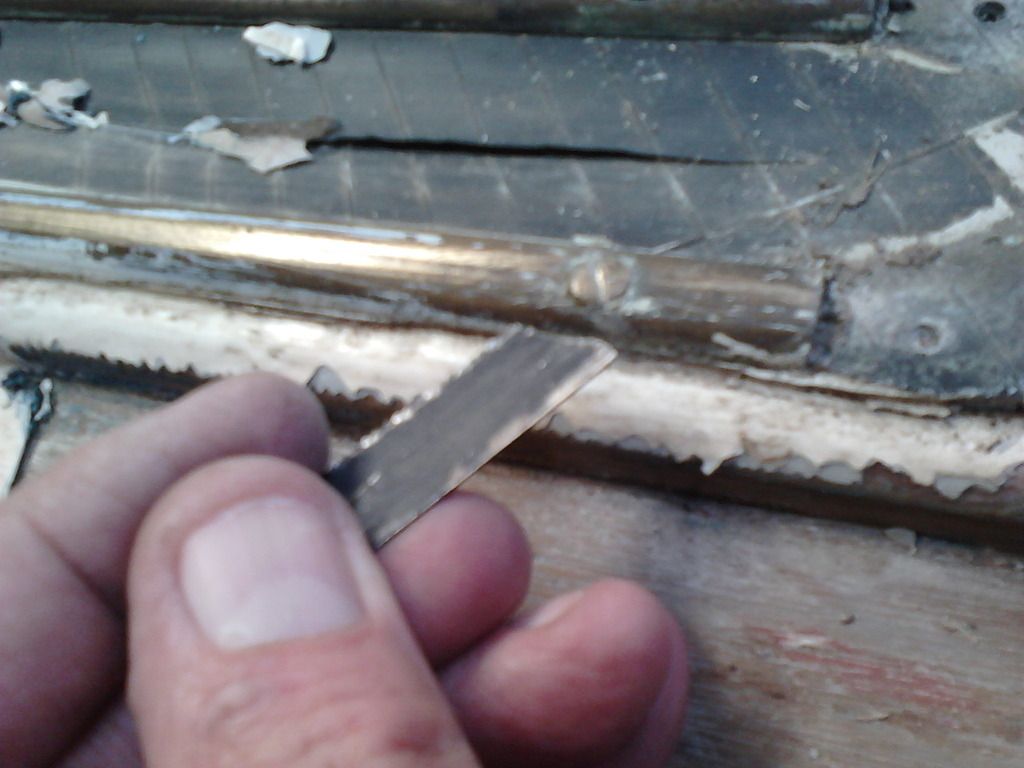
Application of the soldering iron to the first two proved futile as the fixings had corroded to half their original length and diameter. OK this gasket's going to put up a fight, the biggest problem though is the lack of serviceable slots in the screws. Before considering drilling out the fixing I find it's always worth spending 15mins on trying to resurrect the slot. Tool of choice is a snapped off bit of hacksaw blade. Use one of those cheapy diamond laps to create a chisel edge on it and use this to nibble the slot. It works on steel screws so it's even easier to do on brass/bronze. The action is to nibble forwards a few mm whilst restraining it with the thumb of the opposite hand.
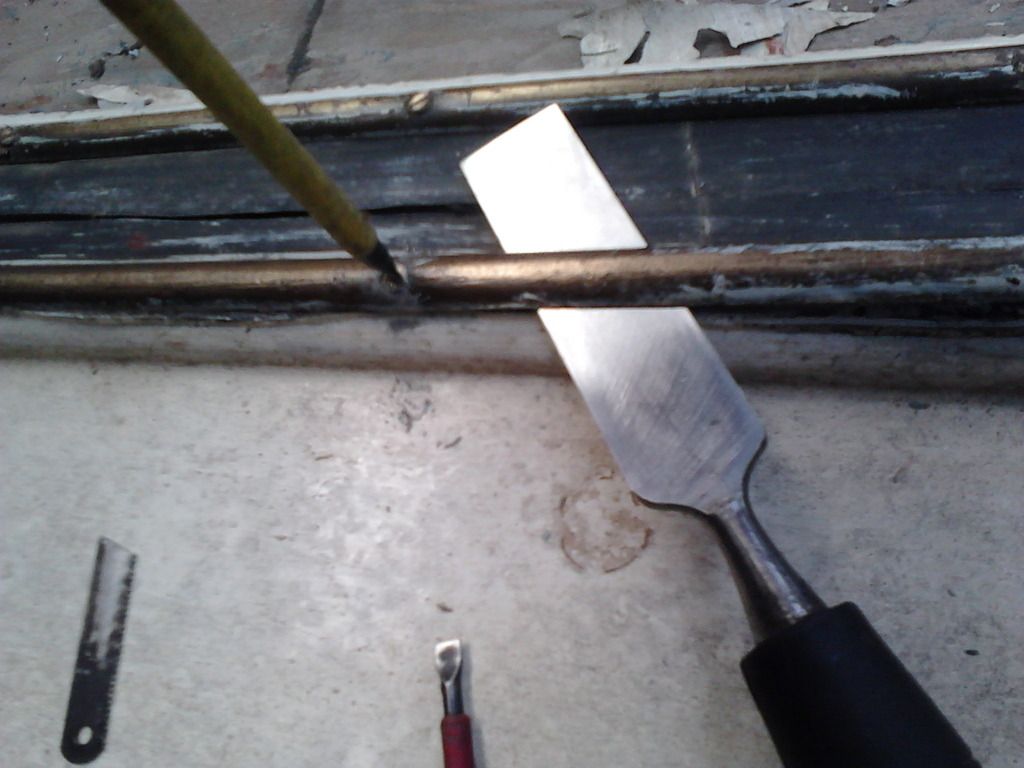
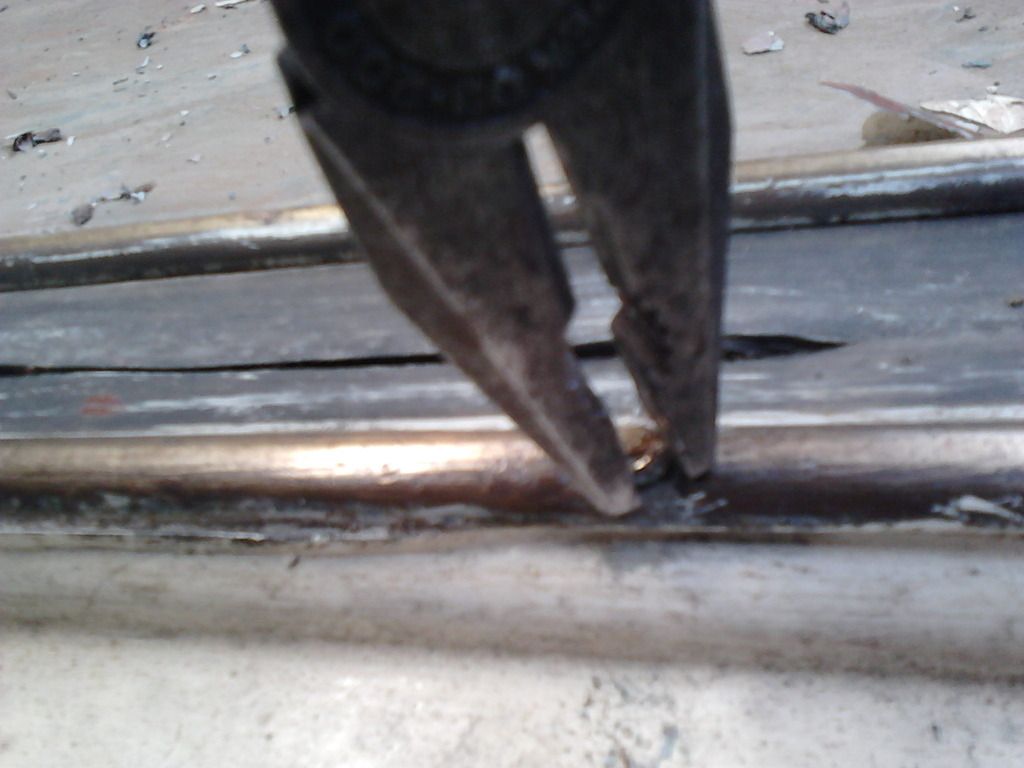
So with a decent slot reinstated you apply the driver and the whole thing spins in the hole. Insufficient spiral thread left. Here I slipped a chisel (plane iron would have been better) under the keel band to impart the necessary lift sufficient to raise the screw a few millimetres such that I could get a grip with the pliers.
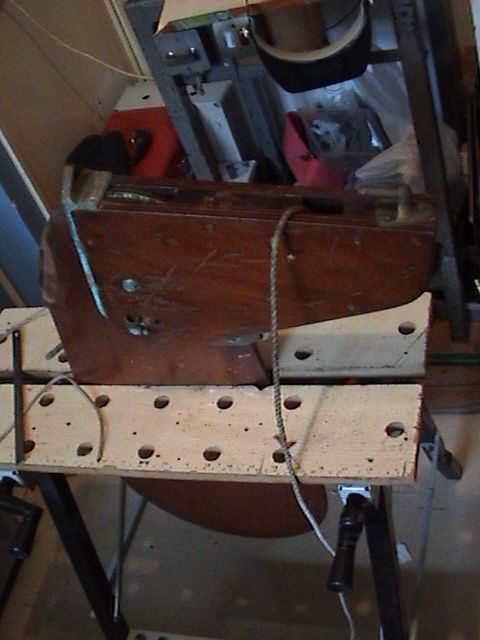
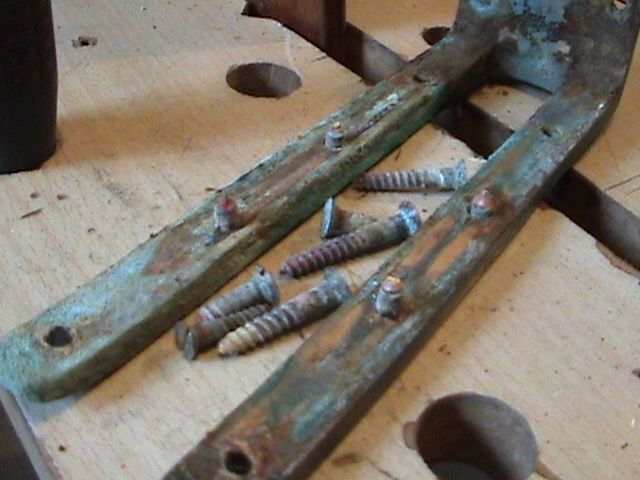
Got about 15 stumps to remove and plug. Thought I'd drag the rudder home and work on it closer to a source of tea. Here's the patient on the operating table...
Pfffft... more of the same.
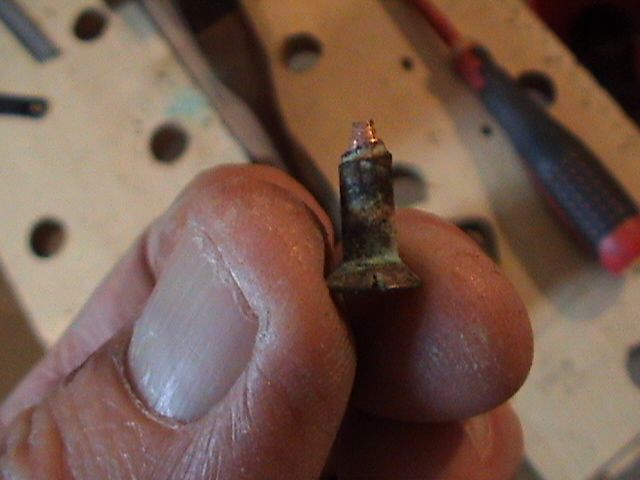
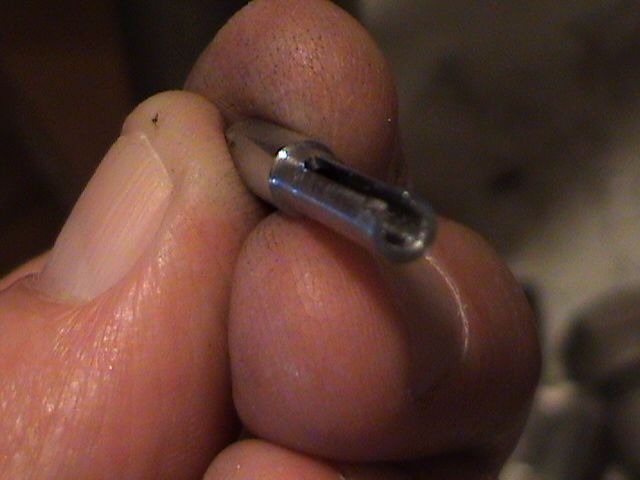
They always seem to shear off to a point leaving a depression in the captive bit, unfortunately it's rarely on centre so expecting it to receive a pilot drill bit and stay on track through the middle of the screw is a big ask. One answer is to force it to stay on centre by using a tight fitting sleeve to remove the fixings that had sheared halfway down. Thusly...
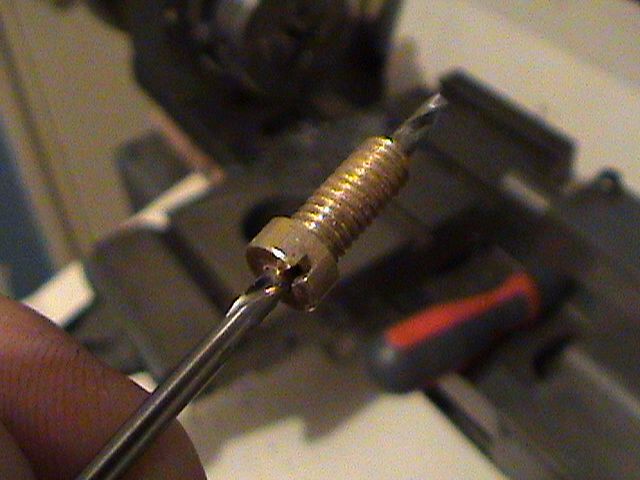
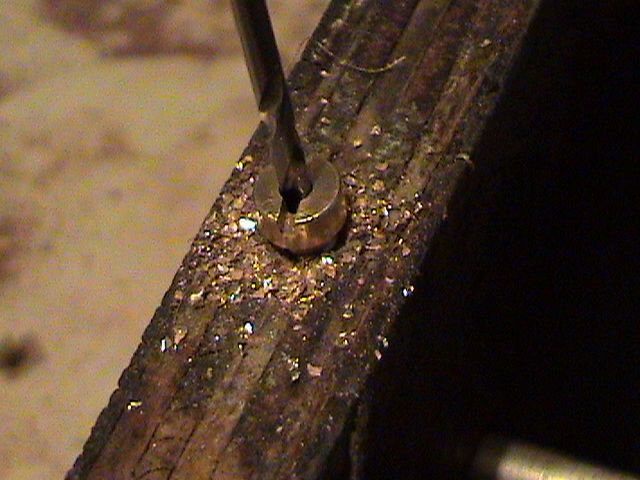
An old brass electrical terminal screw from the gash bin, got hundreds of them in a vast array of metric and imp diameters. Had to turn a few tenths of a mil off this one to get a nice tight slop free fit in the hole without expanding the plies.
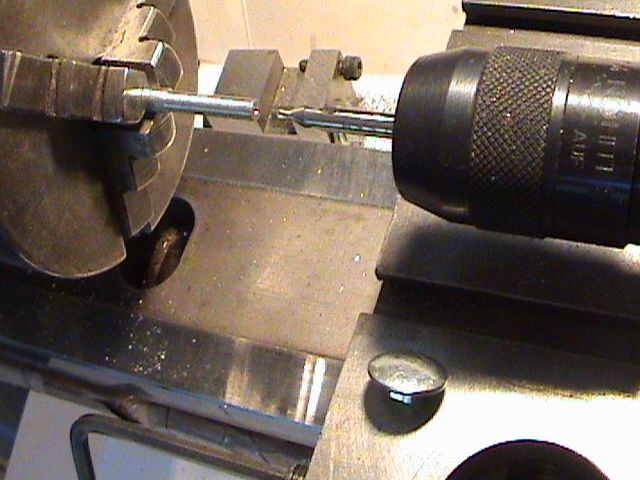
As for the roll pin trick, I've used them once before in aluminium and it worked a treat but short of cannibalising my machines I couldn't find one of the right size to modify into a core drill for the tiller fixings. Solution:- got lathe, got miller = make one. Using drill bits as gauges I determined that the hole left by the sheared off shank was 4.2mm so I sawed the head off an M6 carriage bolt and centred it up in the 4 jaw chuck. (yeah I know it's a 3j in the pic but I had to re-chuck it to get more legroom for the longer drills and took the pic before that)
centre drilled...
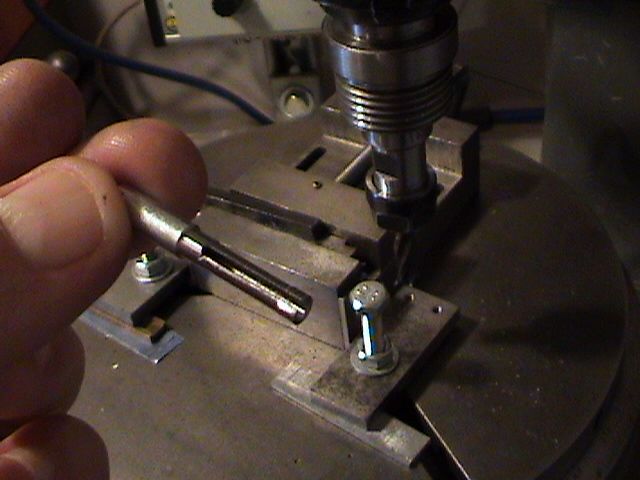
bored out to about 1" depth...
a 1mm clearance slot milled...
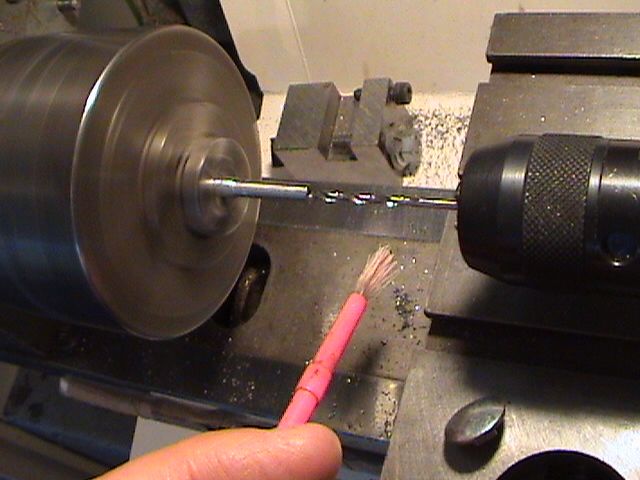
and a quick polish before forming the edge and an ad hoc 'ghetto' quench hardening over the gas hob...
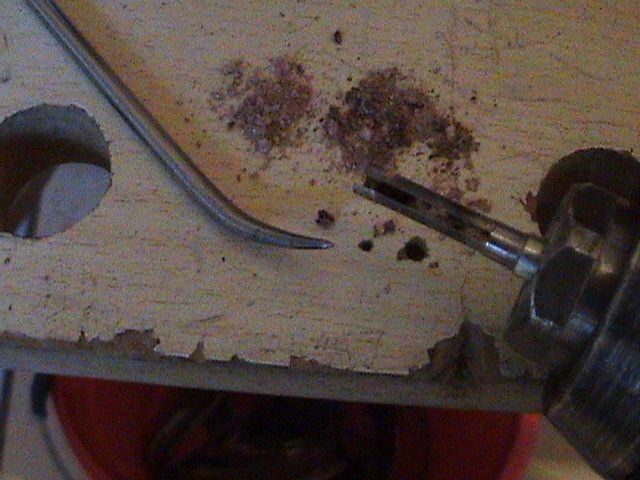
the result when applied... pink sawdust...
Don't have access to a proper tool grinder so although it did the job it was difficult to produce a pukka properly relieved cutting edge so it wasn't very efficient. Gonna have a quick redesign for the Mk2.
Application of the soldering iron to the first two proved futile as the fixings had corroded to half their original length and diameter. OK this gasket's going to put up a fight, the biggest problem though is the lack of serviceable slots in the screws. Before considering drilling out the fixing I find it's always worth spending 15mins on trying to resurrect the slot. Tool of choice is a snapped off bit of hacksaw blade. Use one of those cheapy diamond laps to create a chisel edge on it and use this to nibble the slot. It works on steel screws so it's even easier to do on brass/bronze. The action is to nibble forwards a few mm whilst restraining it with the thumb of the opposite hand.

So with a decent slot reinstated you apply the driver and the whole thing spins in the hole. Insufficient spiral thread left. Here I slipped a chisel (plane iron would have been better) under the keel band to impart the necessary lift sufficient to raise the screw a few millimetres such that I could get a grip with the pliers.


Got about 15 stumps to remove and plug. Thought I'd drag the rudder home and work on it closer to a source of tea. Here's the patient on the operating table...

Pfffft... more of the same.


They always seem to shear off to a point leaving a depression in the captive bit, unfortunately it's rarely on centre so expecting it to receive a pilot drill bit and stay on track through the middle of the screw is a big ask. One answer is to force it to stay on centre by using a tight fitting sleeve to remove the fixings that had sheared halfway down. Thusly...

An old brass electrical terminal screw from the gash bin, got hundreds of them in a vast array of metric and imp diameters. Had to turn a few tenths of a mil off this one to get a nice tight slop free fit in the hole without expanding the plies.

As for the roll pin trick, I've used them once before in aluminium and it worked a treat but short of cannibalising my machines I couldn't find one of the right size to modify into a core drill for the tiller fixings. Solution:- got lathe, got miller = make one. Using drill bits as gauges I determined that the hole left by the sheared off shank was 4.2mm so I sawed the head off an M6 carriage bolt and centred it up in the 4 jaw chuck. (yeah I know it's a 3j in the pic but I had to re-chuck it to get more legroom for the longer drills and took the pic before that)
centre drilled...

bored out to about 1" depth...

a 1mm clearance slot milled...

and a quick polish before forming the edge and an ad hoc 'ghetto' quench hardening over the gas hob...

the result when applied... pink sawdust...

Don't have access to a proper tool grinder so although it did the job it was difficult to produce a pukka properly relieved cutting edge so it wasn't very efficient. Gonna have a quick redesign for the Mk2.
...well if it was easy everybody would have one.
Re: Removing brass stews from keel?
I have made similar cutters and found filing some saw teeth on the end with a needle file helped the cutting action. Does all get quite hot though!
-
Brian E. Evans
- Posts: 127
- Joined: Sat Oct 02, 2004 6:31 am
- Location: USA
- Contact:
Re: Removing brass stews from keel?
remember it is the bottom edge that does the cutting , so a cutting edge on the side does not do you much good.
Brian.
Brian.